Heart basket
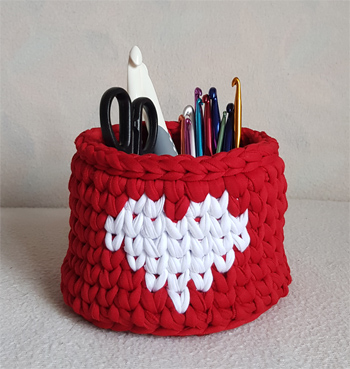
The heart design on this basket makes it perfect for Valentine's Day themed project.
I have discovered the Fair Isle technique and I think this basket is really easy to make and works up quickly.
This basket can be gifted on different occastions like Valentine's Day, Mother's day or even other important events. It can be used as home decor, as crochet hooks holder (like I do :)) or just to store pencils and other desk items.
Find more patterns: www.byoana.com
Video pattern
Pattern
Base:
Start with the red yarn:
Row 1: 6 sc in magic circle
Row 2: (inc) x6
Row 3: (wc, inc) x6
Row 4: (2 wc, inc) x6
Row 5: (3 wc, inc) x6
Row 6: wc in each stitch around
Height:
Row 1: bl-sc in each stitch around
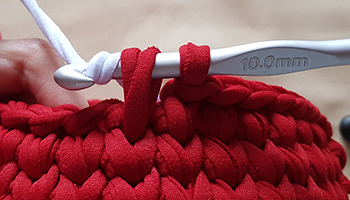
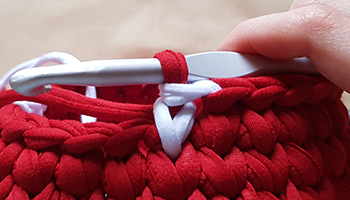
How to change colors?
- insert hook into the next V space
- pull up one loop of first color yarn
- yarn over with second color yarn to complete the wc stitch
After these stepts are completed, you'll be able to continue with the second color yarn.
Make sure to carry along both colors, on the back side of your work.

Check out the diagram to see when to switch to white color on each row.
Row 2: Make 15 wc red, 1 white (so that this one is made in the middle), continue with red color until the end of the row
Row 3: 3 white wc stitches in the middle
Row 4: 5 white wc stitches in the middle
Row 5: 7 white wc stitches in the middle
Row 6: 7 white wc stitches in the middle
Row 7: 2 white, 1 red, 2 white wc stitches in the middle
Row 8: wc in each stitch around, with red color only
Row 9: sl st in each stitch around

Done!
Enjoy your new basket! :)
Hope you liked this tutorial! :)